How to Make Crispy Fried Chicken Step by Step
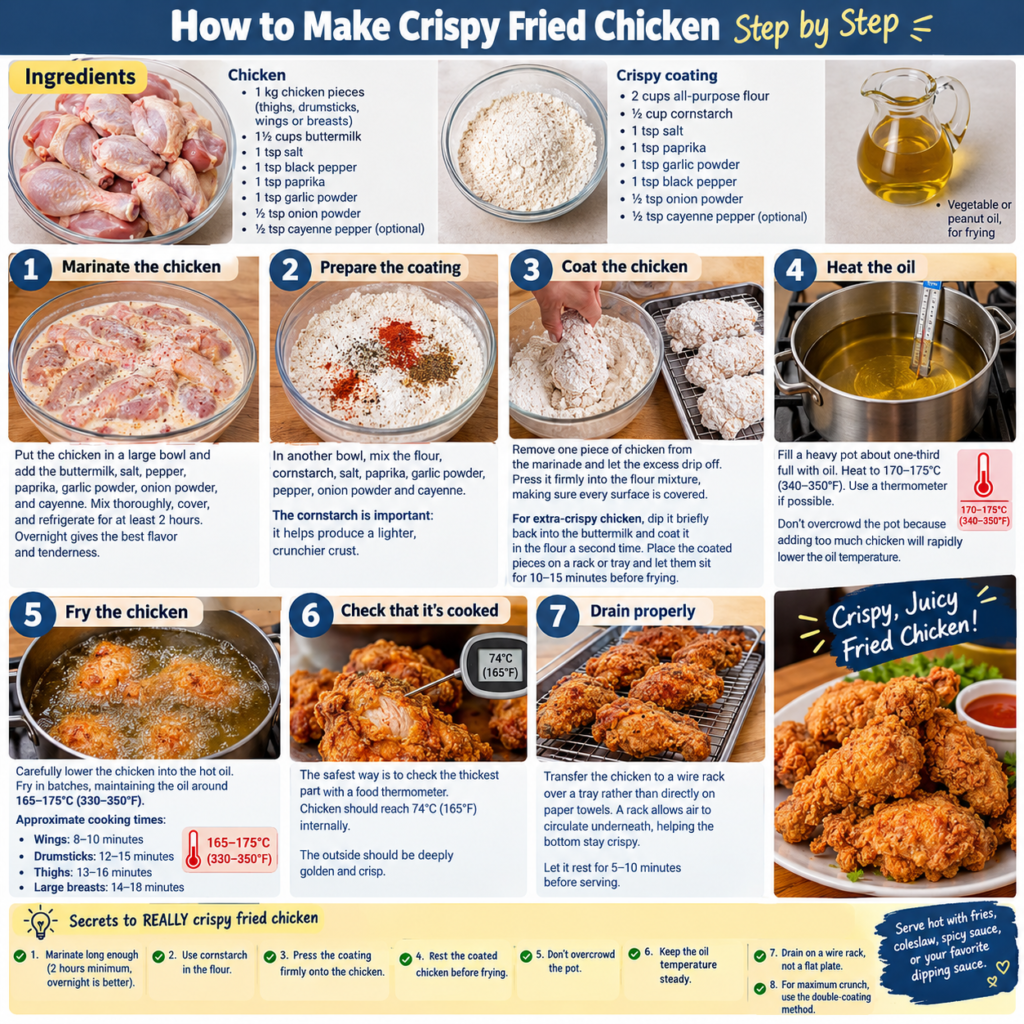
Few meals are as satisfying as homemade crispy fried chicken. When it’s done properly, the outside is golden and crunchy while the inside remains tender, juicy, and flavorful.
The good news is that you don’t need professional cooking skills to make delicious fried chicken at home. With a simple marinade, well-seasoned coating, and the right frying technique, you can create a crispy meal your whole family will enjoy.
Ingredients
For about 4–6 servings:
For the chicken
- 1 kg chicken pieces
- 1 cup buttermilk or plain yogurt thinned with a little water
- 1 teaspoon salt
- 1 teaspoon paprika
- ½ teaspoon black pepper
- ½ teaspoon garlic powder
- ½ teaspoon onion powder
For the crispy coating
- 2 cups all-purpose flour
- ½ cup cornstarch
- 1 teaspoon paprika
- 1 teaspoon garlic powder
- 1 teaspoon onion powder
- ½ teaspoon black pepper
- ½ teaspoon salt
- ½ teaspoon dried thyme, optional
- ½ teaspoon cayenne pepper, optional
For frying
- Vegetable or other suitable cooking oil, enough for deep or shallow frying
Step 1: Prepare the Chicken
Start by patting the chicken pieces dry with paper towels.
This removes excess moisture and helps the marinade and coating stick better.
If you’re using large pieces of chicken, you can make a few shallow cuts into the thicker parts. This can help the seasoning penetrate and encourage more even cooking.
Step 2: Marinate the Chicken
Place the chicken in a large bowl.
Add the buttermilk or thinned yogurt, salt, paprika, black pepper, garlic powder, and onion powder.
Mix thoroughly so every piece is coated.
Cover the bowl and refrigerate.
For the best flavor, allow the chicken to marinate for several hours or overnight. If you’re short on time, even 30 minutes can help.
The acidic dairy marinade helps tenderize the chicken while adding flavor.
Step 3: Prepare the Flour Mixture
While the chicken is marinating, prepare the coating.
Add the flour, cornstarch, paprika, garlic powder, onion powder, black pepper, salt, thyme, and cayenne pepper to a large bowl.
Mix thoroughly.
The cornstarch is useful because it helps create a lighter, crispier crust.
You can adjust the spices according to your taste.
Step 4: Coat the Chicken
Remove one piece of chicken from the marinade.
Let the excess liquid drip off.
Place the chicken into the seasoned flour mixture.
Press the flour firmly onto the chicken, making sure it is completely covered.
For an extra-crispy crust, dip the piece back into the marinade and then into the flour mixture a second time.
Repeat with the remaining chicken pieces.
The coating should look rough and textured rather than perfectly smooth. Those little flakes become wonderfully crispy during frying.
Step 5: Heat the Oil
Pour the cooking oil into a heavy-bottomed pot or deep frying pan.
Heat the oil to approximately 170–180°C (340–350°F).
A kitchen thermometer makes this much easier and safer.
If the oil is too cool, the chicken can absorb excess oil and become greasy.
If it’s too hot, the coating may burn before the chicken is cooked through.
Avoid filling the pan too much with chicken because adding too many pieces can cause the oil temperature to drop quickly.
Step 6: Fry the Chicken
Carefully place the coated chicken pieces into the hot oil.
Don’t drop them from a height because hot oil can splash.
Fry the chicken in batches if necessary.
Cook until the coating is deeply golden and the chicken is fully cooked.
The exact cooking time depends on the size and type of chicken pieces.
Thicker pieces generally require more time than smaller pieces.
Step 7: Check That the Chicken Is Cooked
The safest way to check fried chicken is with a food thermometer.
Insert the thermometer into the thickest part of the chicken without touching the bone.
The chicken should reach an internal temperature of 74°C (165°F).
If the outside is becoming too dark before the inside is cooked, reduce the heat and continue cooking carefully.
Step 8: Drain the Chicken
Once the chicken is cooked, carefully remove each piece from the oil using tongs or a suitable slotted utensil.
Place the chicken on a wire rack over a tray.
A wire rack allows excess oil to drain away while letting air circulate around the crust.
If you don’t have a wire rack, you can temporarily use paper towels, although the bottom may become slightly less crispy.
Allow the chicken to rest for a few minutes before serving.
Tips for Extra-Crispy Fried Chicken
Use cornstarch
Adding cornstarch to the flour mixture can help create a lighter, crunchier crust.
Don’t skip the marinade
Marinating the chicken improves both flavor and tenderness.
Press the coating onto the chicken
Instead of simply dipping the chicken in flour, press the coating firmly onto each piece.
Create a double coating
For a thicker crust, dip the chicken into the marinade and flour mixture twice.
Keep the oil temperature steady
A thermometer is one of the most useful tools when making fried chicken.
Fry in batches
Overcrowding the pan can lower the oil temperature and result in greasy chicken.
Use a wire rack
Allowing the fried chicken to sit directly on a plate can trap steam underneath the crust. A rack helps maintain crispiness.
What to Serve With Crispy Fried Chicken
Fried chicken pairs well with many different sides.
Try serving it with:
- Jollof rice
- Fried rice
- Mashed potatoes
- French fries
- Coleslaw
- Corn
- Green salad
- Baked beans
- Dinner rolls
- Plantains
For a Nigerian-inspired meal, you could serve crispy chicken with jollof rice, fried plantain, and a fresh vegetable salad.
Common Fried Chicken Mistakes
The coating falls off
This can happen when the chicken is too wet or the flour isn’t pressed firmly onto the surface.
Let excess marinade drip off before coating the chicken.
The chicken is greasy
Usually, this happens when the oil isn’t hot enough or the pan is overcrowded.
The coating burns
The oil may be too hot. Lower the heat and allow the temperature to stabilize.
The chicken is raw inside
Large pieces need more cooking time. Always check the internal temperature rather than relying only on the color of the coating.
The crust isn’t crispy
Make sure the oil is at the proper temperature and avoid covering the chicken immediately after frying, as trapped steam can soften the crust.
How to Store Leftover Fried Chicken
Allow leftover chicken to cool before refrigerating it.
Store it in an airtight container and refrigerate promptly.
When reheating, an oven or air fryer generally does a better job of restoring the crispy texture than a microwave.
Avoid leaving cooked chicken at room temperature for extended periods.
Final Thoughts
Making crispy fried chicken at home is easier once you understand the basic process.
The key steps are simple:
Marinate → season → coat → fry at the right temperature → check the internal temperature → drain and serve.
Don’t worry if your first batch isn’t perfect. Like most cooking techniques, fried chicken gets easier with practice.
Once you’ve mastered the basic recipe, you can experiment with different seasonings, marinades, and side dishes to create your own family favorite